


The Cultivator’s Blueprint: A Masterclass on Dominating Roblox: Garden Horizons
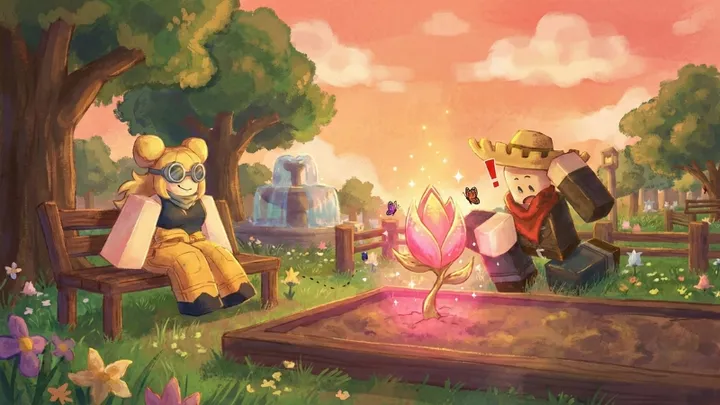
In the sprawling ecosystem of Roblox, Garden Horizons has emerged as a titan of the "Cozy-Industrial" genre. Unlike traditional farming simulators that focus on simple harvest-and-sell loops, Garden Horizons introduces a complex layer of Bio-Mechanical Synchronization. This is the specific challenge that separates casual planters from elite horticulturists: the ability to balance organic plant growth with a high-efficiency automated irrigation and fertilization network. To master this game is to understand that your garden is not just a collection of plants, but a living machine that requires precise calibration, spatial optimization, and genetic manipulation to reach the "Horizon Tier" of production.
1. Groundwork: Selecting Your Initial Biome Strategy
Before the first seed touches the soil, the most critical decision a player makes is their starting plot location. Garden Horizons offers three distinct biomes: the Verdant Valley, the Azure Coast, and the Crimson Highlands. Each biome carries a specific environmental modifier that affects growth rates. The "Verdant Valley" is the recommended start for those focusing on "how to" build a stable foundation, as it offers a 10% boost to organic decomposition, which is vital for early-game composting and soil enrichment.
Choosing your biome dictates your long-term resource bottlenecks. For instance, the Azure Coast provides infinite water access but suffers from "Salt-Spray Corrosion," which damages automated machinery over time. Beginners should prioritize the Valley to master the basic mechanics of soil pH and nutrient density without the constant threat of mechanical failure. Your first hour should be spent clearing land not just for crops, but for the "Power Grid" that will eventually run your entire operation.
2. Soil Engineering: Mastering the pH and Nutrient Balance
The specific issue that frustrates many new players is "Stunted Growth." This is rarely a lack of water; rather, it is a failure to manage the Soil Composition Index. Every plant in Garden Horizons has a specific pH preference. To succeed, you must learn how to manipulate the ground using lime (to raise pH) or sulfur (to lower it). Without this technical oversight, even your most expensive seeds will fail to reach their full "Yield Potential."
The Nutrient Triangle
- Nitrogen (N): Essential for leafy growth and speed. Over-applying nitrogen leads to "Leaf-Burn," killing the plant instantly.
- Phosphorus (P): Critical for root development and flower production. This is the bottleneck for "Fruit-Bearing" crops.
- Potassium (K): Improves the plant's resistance to "Blight" and "Frost" events.
To optimize your soil, you should create a "Compost Loop." By feeding low-value weeds into a Compactor, you generate Organic Fertilizer that provides a balanced N-P-K spread. Advanced players keep separate plots for different pH levels, rotating crops to ensure that one plant’s waste becomes the next plant’s fuel.
3. Hydration Logic: Designing a High-Efficiency Irrigation Network
Once your soil is prepared, you face the challenge of water management. The "How-To" of irrigation in Garden Horizons moves from the handheld watering can to the "Pressure-Regulated Sprinkler System." The specific issue here is Water-Logging, where too much moisture leads to "Root Rot," effectively deleting your progress. You must learn to read the "Saturation Meter" on your HUD to find the "Goldilocks Zone" for each crop.
Irrigation Components
- Storage Tanks: These collect rainwater. Always build these on higher elevation to utilize "Gravity-Fed Pressure," which saves on electrical costs.
- Pressure Valves: These allow you to throttle water flow to specific zones. Succulents need 10% flow, while Hydro-Melons require 90%.
- Moisture Sensors: High-tier items that automatically shut off water when the soil reaches the ideal saturation.
4. The Genetic Lab: Breeding for Horizon-Tier Strains
In the mid-game, standard seeds are no longer sufficient to maintain your rank. This is where you must engage with the Cross-Pollination Mechanic. By placing two different plant species in adjacent "Breeding Tubs," you can create hybrid seeds with "Mutation Traits." The specific goal is to breed a plant with the "Fast-Growth" gene and the "High-Luster" gene, the latter of which quadruples the sell price of the harvest.
Hybridization Priorities
- Resilience Gene: Allows plants to grow in any biome regardless of temperature.
- Auto-Harvest Gene: Causes the plant to drop its fruit automatically, saving the player manual clicks.
- Glow-Strain: A rare mutation that allows the plant to produce its own light, eliminating the need for expensive "Sun-Lamps" during the night cycle.
5. Industrialization: Transitioning to the Auto-Harvester Phase
As your garden expands to cover multiple acres, manual harvesting becomes an impossibility. The transition to the "Industrial Phase" involves the construction of Conveyor Logistics. The specific issue that occurs during this transition is "Item Clogging." If your conveyor belts move faster than your "Shipping Bin" can process them, items will overflow and despawn, causing massive financial loss.
To master this, you must build "Buffer Chests." These act as a temporary storage area that regulates the flow of produce into the market portal. You should also invest in "Industrial Sorters," which automatically separate high-quality "Gold-Tier" produce from "Standard" crops, allowing you to sell the best and compost the rest without manual sorting.
6. Power Management: Fueling the Neon Garden
Everything from your genetic labs to your moisture sensors requires "Solar-Watts." The "How-To" of power involves balancing your "Battery Storage" with your "Peak Consumption." During the day, your solar panels generate an excess of energy, but if your batteries are too small, your sprinklers will fail at midnight, leading to a "Wilting Event" by morning.
Power Source Tier List
- Tier 1 (Manual): The "Crank-Gen" requires player stamina but is a vital backup for emergencies.
- Tier 2 (Solar): Clean and passive, but useless during the frequent "Overcast" weather events.
- Tier 3 (Bio-Fuel): The most efficient source, using your excess "Compost" to generate massive amounts of power.
By the time you reach Tier 3, your garden becomes a closed-loop system where the plants provide the fuel to run the machines that grow the plants.
7. Pest Control and the "Blight" Defense
Garden Horizons is not entirely peaceful. Randomly, your garden will be struck by "The Blight" or "Aphid Swarms." The specific issue here is Contagion Velocity. If one plant is infected, the blight will spread to adjacent tiles every 60 seconds. If you are away from your garden or deep in the menus, you could return to find a total wasteland.
To defend against this, you must implement "Firewalls"—gaps in your planting rows that prevent the spread of disease. Additionally, you should breed "Guardian Plants" like the "Lavender-Shield," which releases a natural pheromone that repels pests in a 5x5 radius. For late-game players, the "Auto-Sentry Turret" can be loaded with "Anti-Fungal Mist" to automatically target infected plants.
8. Market Manipulation: The "Horizon" Trading Post
The economy of Garden Horizons is player-driven and fluctuates based on server-wide supply and demand. The specific "How-To" of wealth accumulation is Counter-Cyclic Selling. If everyone on the server is growing "Lumen-Corn," the price will crash. To succeed, you must monitor the "Global Trend" board and grow the "Rare-Rotation" crop—the one plant that no one else is currently producing.
Trading Strategies
- Bulk Contracts: Some NPCs offer massive payouts for 1,000 units of a specific crop. These are the best way to earn "Horizon Credits."
- The Seed Exchange: Instead of selling crops, turn them into seeds. High-mutation seeds often sell for 10x the price of the fruit itself on the player market.
- Hoarding: Store your "Ever-Fruit" in refrigerated bins and wait for a "Famine Event" to sell at 500% profit.
9. Aesthetic Ascension: Decorating for "Prestige"
While efficiency is key, the game rewards those who focus on the "Visual Harmony" of their garden. The "Prestige" system tracks your garden's beauty and grants "Aura Buffs" that further increase growth rates. The specific issue here is Clutter Penalties. Placing too many machines in one area reduces your prestige.
To solve this, you must learn "Hidden Logistics"—hiding your pipes and wires under "Pathways" or "Hedge-Walls." Using the "Architect’s Tool," you can create tiered gardens with waterfalls that double as irrigation sources. A beautiful garden isn't just for show; it is a functional requirement for reaching the final "Arch-Gardener" rank.
10. Conclusion: Reaching the Horizon
Mastering Roblox: Garden Horizons is a journey from a simple dirt-dweller to a master of the Bio-Mechanical arts. The "How-To" of the game is rooted in the management of the Bio-Mechanical Synchronization—ensuring that your technology never outpaces your nature, and your nature never overwhelms your technology. It is a game of patience, requiring you to spend hours in the genetic lab and seconds in the market, making split-second decisions during a Blight outbreak while planning a hundred-year legacy of seeds.
When you finally unlock the "Horizon Gate" and look back at your automated, glowing, and perfectly balanced ecosystem, you realize that Garden Horizons is a metaphor for balance. To cultivate the land is to cultivate the mind. Whether you are a solo player or part of a massive gardening guild, the principles of soil, water, power, and genetics will remain your guiding stars on the road to the horizon.
Summary: This guide explores how to master Roblox: Garden Horizons through soil engineering, irrigation logic, and genetic breeding to achieve bio-mechanical synergy.